Freezing, Preserving Apple and Pear Pie Fillings

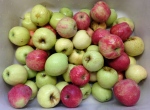
pie baking apples pie baking pears

With 4 plum trees, 8 apple trees and 5 pear trees, there are so many things one can do with all this fruit, other than feed the visiting deer. As for me – I’ve canned them, made yummy desserts, (my mother-in-law has turned me on to some awesome recipes), dried them, as well as simply eating them on the fly. But even after all that’s said and done, its not enough because there are so much left over. So what’s a gal to do?

Well check out this other way to use all that fruit – pear and apple pie fillings. Yes, you can preserve all that fruit for pies!! You can jar the fillings, freeze the fillings, or even make the pies and freeze them too. Woohoo – I’m on it !!

Here’s an apple pie filling recipe that I got from my Canadian friend Ardis. She makes over 50 pies and freezes them so they’re on hand when she goes visiting over the winter, or when her hubby Gary just … wants … pie … for … desert. Enjoy

ARDIS’S APPLE OR PEAR PIE FILLING
(Makes 1 pie)

7 apples or pears: peeled, cored and sliced (I cubed some of mine), place in bowl with 1 cup water and 1 tbls lemon juice to prevent browning
3/4 cup sugar
2 tbls flour
3/4 tsp cinnamon
1/8 tsp nutmeg
1/4 tsp salt

Mix filling together. Remove apple/pear pieces from lemon water and add to the bowl of filling mix and coat thoroughly.

Freezing Methods

pear pie filling

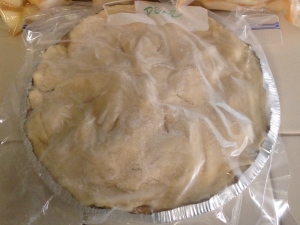
At this point you can either place the filling in a FoodSaver Vacuum Sealer and freeze it as shown in the picture above. When it’s time to make your pie, simple thaw the bag of fruit and add it to your pie crust and bake your pie as usual. Or you can now make your pie crust, add the filling, add your pie topping, and put the entire pie in a zip lock bag and freeze it for later as shown in the picture below. Either way works wonderfully.

frozen pear pie

Baking A Frozen Pie

Turn your oven temp to 425 and bake the frozen pie for 15 min. Drop the temp to 375 and bake for an additional 45 minutes. Simply scrumptious !!

So what’s on the agenda for tomorrow? Canning pie filling. Until then – enjoy 🙂

Home Grown Garden Vegetable Soup

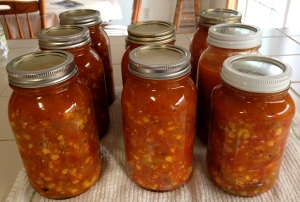
Don’t you just love it when you’re able to can/jar a product and all its contents are from your garden? Well that’s what I’ve got going on here – a garden vegetable soup preserved with my new pressure canner. The first batch made 3 quarts, and the second batch made 6 quarts and 1 pint (hiding behind the big guys). Finally – my world has just opened up another chapter on what to do with all these tomatoes. I just love this pressure canner !!

If anyone has other recipes for tomatoes … please share them as I have tons that I’ve picked that are sitting in boxes; with more so still growing in the garden. Enjoy 🙂

GARDEN VEGETABLE SOUP

vegetable soup

INGREDIENTS

4 carrots, sliced
2 medium zucchini, halved and sliced
2 onions, chopped
6 celery stalks, chopped
3 corn on the cobs, shaved
4 garlic cloves, minced
20 nice size tomatoes, prepared below
1 tsp salt
2 tsp fresh ground pepper
1 tbls fresh Basil
1 tbls fresh Thyme
Olive oil
2 lemons, juiced
1\2 cup of water
1 cup beans (optional)

DIRECTIONS

Heat up the olive oil in a large pot. Sauté the onions, corn, celery and garlic for 2 minutes. Add carrots, zucchini, basil, thyme, water, salt and pepper – stir together and cook on a slow simmer while you’re preparing the tomatoes.

THE TOMATOES

Drop 4-5 tomatoes in a pot of pre-boiled water for 30 seconds to loosen the skin. Remove them from the pot (be careful because they’re hot to handle), slip the skins off the tomatoes and remove the cores. Place them in another bowl while you repeat the process with the rest of the tomatoes.

Once all are de-skinned and their cores removed, squish the tomatoes with your hands or use a potato masher and make them into bite size pieces.

Add the squished tomatoes to your soup pot along with the lemon juice and beans (optional). Mix together and simmer for 1 hour.

Ladle the soup into very warm and clean jars, leaving 1/4″ head space. Seal with lids and tops and place them in your prepared pressure canner for 25 minutes. Remove from canner and let them sit on your kitchen counter for 24 hours.

Viola – home made and home grown vegetable soup for storage.

Intimidation Of A … Pressure Canner

Do you have an over abundance of tomatoes and want to preserve them other than making the typical stewed tomatoes and tomato sauce? Did your veggies grow like crazy and now you’re short on freezer space? Well thats the situation I’m in right now. And knowing there are food safety concerns when it comes to canning vegetables, or tomatoes with veggies via the hot water bath, my only other option was to invest in a pressure canner.

Here’s the skinny on pressure canning. Water boiling processing at temps at/or below 212 degrees, sufficiently destroys mold, yeasts, and enzymes. But it’s the bacteria (clostridium botulinum) that produces a poisonous toxin which causes botulism, that is not destroyed at 212 degrees. In addition, the bacteria thrive on low acid food (vegetables, meats). For a safe food product, low acid food needs to be processed at 240 degrees, which can only be achieved with a pressure canner.

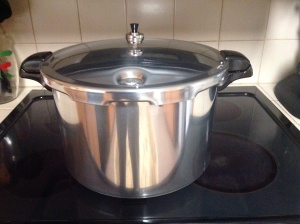
Presto 16 quart pressure canner

So with this in mind, here it is – yesterday’s purchase of the 16 quart Presto Pressure Canner. And geez, if your a newbie to pressure canners, they’re intimidating as heck. Just unpacking this bad boy was pretty scary. But if I can give you any advice when it comes to first time usage, especially if you’re a newbie like me, read the directions thoroughly, and then do what I did – watch a couple youtube videos (thank goodness for the internet). Hopefully they will ease any concerns you may have – well maybe!

So what’s on my canning agenda for today? Cooking up some Garden Vegetable Soup and then processing it in my new canner. Keep your fingers crossed that I don’t blow up my kitchen in the process.

Ciao for now.

Stewed Tomatoes and Salsa With A Bite

After processing a couple more batches of cucumbers yesterday, I swear my entire house smelled like the inside of a giant pickle jar. And as much as I like eating them, pickle eau de toilette is not a fragrance I want to be wearing. But check out what I discovered all by happenstance.

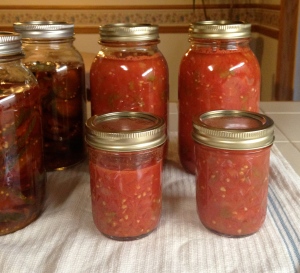
So my canning plan for today also included processing some STEWED TOMATOES and SALSA. And as I started stewing up all the tomatoes that I had sitting on my counter, I noticed the pickle smell began to go away. And by the time the stewed tomatoes and salsa were ready to hit the jars … no more pickles. The odor was seriously gone – and it wasn’t replaced with a tomato smell either. I’ve always heard the way to remove a skunk smell from a dog was to give them a tomato bath; never had to do it, but often wondered if it was a true remedy. Well I guess it would do the trick because as I’ve just found out – tomatoes do kill odors. So there ya go, you get a twofer today 🙂

So how did the stewed tomatoes and salsa turn out? My Mr. Big loved, loved, loved it and that’s all I was aiming for. Here’s the recipe I followed. You can increase or decrease the jalapeño amount depending on how hot you want it. This recipe should yield 8 pints, but I mixed the sizes up a bit just because … I can :-). Enjoy and happy canning.

stewing tomatoes and salsa

HOMEMADE STEWED TOMATOES or SALSA
(omit last 5 ingredients for stewed tomatoes)

STEWED TOMATOES INGREDIENTS

14 cups of diced tomatoes (see below)
4 bell peppers, seeded and chopped
2 medium onions,chopped
½ cup of lemon or lime juice
4 minced cloves of garlic

ADD FOR SALSA

½ cup of finely chopped jalapeño peppers, with center removed (leave in seeds for super-spicy salsa, reduce or even eliminate amount of jalapeno for milder salsa)
¼ – ½ cup of fresh cilantro leaves, finely chopped
1 tbsp of turbinado sugar
1 tsp of chili powder
½ tsp of cumin powder

DIRECTIONS

Remove the skins from the tomatoes. This is easily done by dropping them in boiled water for about 30 seconds – the skins will peel right off. Then chop them into diced size. Place in a large stainless steel cooking pot.

Add peppers, onion, garlic, and last 5 ingredients if you’re making salsa.

Stir in your lemon or lime juice and all of your seasonings until they are well combined. Bring the mixture to a boil over medium-high heat, then reduced the heat and simmered it for 30-40 minutes.

Ladle the stew mix or salsa into the prepared jars, wipe the lip of the jars, place the flats and rings on them, and lift them into the vigorously boiling water bath.

Process the jars in a boiling water bath (ensuring the jars are completely covered with water) for 15 minutes. Carefully remove them and listen for that delightful PING, and viola – jars are sealed !!

Almond Flour Zucchini Bread

Got zucchini growing in your garden? How about some the size of baseball bats? If so, then you know you’ve got to make some zucchini bread. I really had no choice – my kitchen counter was lined with humongous zucchini’s, at least 8 of them (we found the rascals hiding among the tall leaves) 😉 😉

So in keeping with the wheat and gluten free diet we’ve been following, check out this really awesome recipe (compliments of Against All Grains) that calls for almond flour in lieu of the traditional white. The only thing I would do differently is make one loaf instead of two small ones. I’m thinking my loaf pans weren’t mini ones and therefore my bread turned out small with very little height to it. But that aside, the bread was still very delish and I would definitely recommend it to all my wheat and gluten free eaters.

So there you have it. Make a bunch of loaves, freeze them and enjoy them later 🙂

almond flour zucchini bread

ALMOND FLOUR ZUCCHINI BREAD
Makes 2 mini loaves

INGREDIENTS:

1-1/2 cup blanched almond flour
2 teaspoons cinnamon
1 teaspoon baking soda
½ teaspoon salt
½ teaspoon nutmeg
3 eggs, beaten
¼ cup honey
1 ripe banana
1 cup shredded, unpeeled zucchini

INSTRUCTIONS:

Preheat oven to 350 degrees Farenheit.

Combine the dry ingredients in a small bowl.

Place the wet ingredients in the bowl of a stand mixer, then beat on medium for 1-2 minutes until frothy and fully combined. Add the zucchini and beat again just enough to incorporate.

Slowly add the dry ingredients with the mixer running, until all of the flour mixture has been incorporated.

Spoon the batter into 2 mini loaf pans. You can also use this batter to make muffins.

Bake for 30-35 minutes until the middle is set and a toothpick comes out clean.

Sweet Pickle Relish

One thing nice about making your own canned goods is YOU KNOW EXACTLY WHAT’S INSIDE THE JAR !! No high fructose corn syrups, no MSG’s, and no ingredients you can’t pronounce. And if your lucky enough to have a garden where you can grow your own produce, then you also have the advantage of knowing whether your veggies are organic and without GMO’s. Makes me really wish I started canning a … long … time … ago.

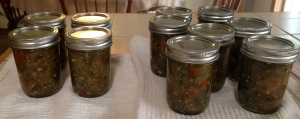
That being said, I’ve still got loads and loads of cucumbers. And since the pickled cucumbers were a big hit yesterday (my Mr. Big actually polished off a whole jar), I will be making it again. But for today, it’s on to sweet pickle relish. The recipe below was found at Heavenly Homemakers, which turned out really, really yummy. I was able to process eleven 6oz jars, with a small one to put in the fridge.

So enjoy 🙂

Sweet pickle relish

SWEET PICKLE RELISH

8 medium-sized cucumbers
2 large onions
2 sweet green peppers
1 sweet red pepper
1/3 cup sea salt
3 cups rapadura or sucanat
3 cups apple cider vinegar
2 T. whole celery seed
2 T. whole mustard seed

DIRECTIONS

Begin by slicing the cucumbers, peppers and onions.

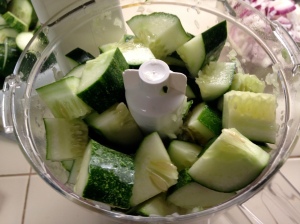
Food processor

Chop the vegetables into tiny pieces (use a food processor, it makes this process so much easier)

Chopped relish veggies

Pour the chopped veggies into a large bowl. Cover them with water and the salt and let them soak for about two hours (longer won’t hurt).

Pour the soaked veggies through a strainer, rinse and drain completely.

Cooked veggies for relish

Pour strained veggies into a large pot and add remaining ingredients. Stir well.

Bring to a boil. Simmer relish for ten minutes, then transfer into pint sized jars. Process the pickle relish in a hot water bath for 10 minutes. Remove and set out to cool.

Zucchini’s Are In The House

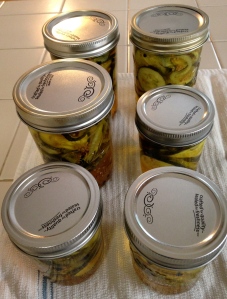
Pickled zucchini

Zucchini season is here and if you’re like me, you’ll have an over abundance of this wonderful squash. Why is it that if nothing else grows, you can always count on zucchini to grow crazy wild? And don’t get me started on that “one” that always stays hidden until the very end; and by the time you finally spot it – it’s the size of a baseball bat! Gotta love it.

So here we go. Continuing with my pickling mode, today’s agenda was sweet and spicy zucchini pickles. And with this being my first time making these, I gotta say they turned out delicious. I am very pleased with the outcome and will definitely be making these again. Here’s the recipe I followed – compliments of “My Pantry Shelf”. Enjoy 🙂

SWEET AND SPICY ZUCCHINI PICKLES
makes 8 cups (4 pints)

2 pounds zucchini
1 medium onion (8 ounce)
2 heaping tablespoons coarse salt
2 cups ice cubes
1 1/2 cup apple cider vinegar
1 1/2 cup white vinegar
2 cups sugar
1 teaspoon whole mustard seed
3/4 teaspoon whole black peppercorns
1/4 teaspoon ground tumeric
1/4 teaspoon crushed red pepper

Sterilize the jars for your pickles by submerging them in boiling water for 10 minutes.

Zucchini and onion

Slice zucchini 1/8 inch thick. Halve the onions and slice thinly as well. Place zucchini in a large bowl. Toss with 1 1/2 tablespoons of salt and 1 1/2 cups of ice. In a separate bowl, toss onion with the remaining salt and then again with the remaining ice. Refrigerate for 3 hours.

Separately drain zucchini and onion. Rinse and drain again.

Bring the rest of the ingredients to a boil. Add the onion and return to a boil. Add the zucchini and remove from heat.

Processing in hot water bath

Ladle zucchini and onions into hot, sterile jars. Bring liquid to a boil again and fill the jars leaving 1/2 inch headspace. Top with a new lid and band. Process in a hot water bath for 10 minutes for half-pint jars and 15 minutes for pints.

Bread And Butter Pickle Recipe For Canning

So I’ve proven I’m really not good at daily postings. And because I’ve been so darn busy this entire summer, I haven’t been good at posting anything lately (truth be told – its been 5 months). But as gardeners, whether your garden is big or if your like me and have more than one, keeping up with the daily chores can become a full-time job. And in addition to growing food, I’m also trying to start a business in vermiculture. So please be patient with my postings – I will try to catch up.

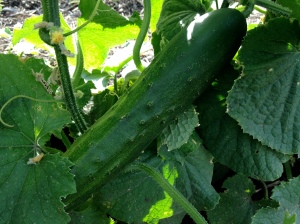
Well this year the cucumbers are growing like crazy. I’m thinking it’s due to a combination of our unusually hot spring and scorching summer, the vermicompost that I added to the soil, and the worm tea I fertilize the plants with. And the end results: now I sit with 40+ cucs on my table with still more on the vines.

cucumbers on the vinegarden cucumbers

And because one can only eat so many salads, this year I’ve decided to jar them as well. So here we go, my first canning of the season – bread and butter pickles.

After much scouring of the web to find just the right recipe, I found that pretty much all of them had the same instructions and ingredients for making bread and butter pickles. So here’s the recipe I put together and used for the bread and butter pickles. And let me tell you – these pickles turned out mmm mmm good and so much better than the ones you get from the store. You’re going to love them.

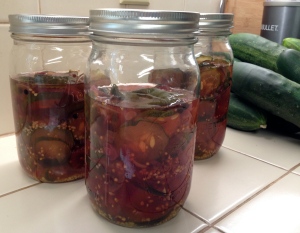
bread and butter pickles

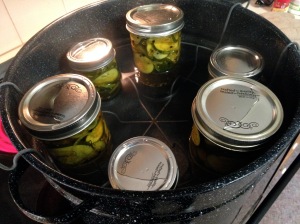
As you can see I left a bit of head space at the top of the three jars. And I only did this because I knew they would be consumed within the next couple weeks. I also know the jars properly sealed after the hot water bath because I heard the tops pop. However that being said, if you’re going to leave some head space at the tops of the jars and plan on storing them, just make sure you have enough liquid covering the veggies – and make sure you hear them seal. Enjoy 🙂

BREAD AND BUTTER PICKLES
makes a total of 2 quarts and 1 pint

5 nice size cucumbers
1 head garlic (approx. 10 cloves)
2 onions
1/4 cup canning salt (I used sea salt)
1 1/4 cup white vinegar – 5% acidity
1 cup apple cider vinegar
2 1/4 cup sugar
1 tbls Ball Mixed Pickling Spice
1 tsp turmeric
3 grape leaves

Slice up the cucumber and onions, mince the garlic. Place all three ingredients in a bowl and cover them with the sea salt. Place a towel on top of the mix and place some ice on top of the towel. Let the bowl sit in the fridge for 3 hours.

In a large pot bring both vinegars, sugar, pickling spice and turmeric to a boil. Add the cucumber, garlic and onion mix to the pot and bring to another boil. Continue boiling for 90 seconds.

Put the mix in sterilized hot jars. Add the grape leaf to keep the cucs crisp. Process the mix in your hot water boil – 20 min for quarts, 10 min for pints.

And viola – now you have some crisp bread and butter pickles 🙂

Springtime Chore List

Garden

It’s early spring and gardeners like myself can’t wait to get outdoors. But with so much to do (yes, it can be a bit overwhelming), where do we begin? Well trust me – there’s a lot less stress if you start with a springtime chore checklist. And here is mine – a 9 point plan that I go thru every year. And I know, there are surely more items/chores that need to be done pre-summertime, but this 9 point plan is a good start. So enjoy my fellow gardeners and let the gardening season begin.

1. Prune away dead and damaged branches.

Look around your gardens and orchards and you’ll find tree and shrub branches that have been damaged by the winters snow and cold weather. These will need to be pruned back to their live stems. The cut pieces can either be burned or put in the compose if you have a wood chipper.

2. Cut back and divide perennials if needed.

The flowering perennials can be pruned to a height of 4-5 inches and 2-3 inches if you have ornamental grass. If your other perennials have become too crowded and dense, you can dig them up and divide them, leaving at least three stems per clump, and then put the extras in some bare spots. For climbing perennials, cut back any dead branches and tie the green canes to hold them in place.

3. Clean up around your plants.

Rake away any leaves and dead foliage and pull up all spent annuals. When all the dangers of frost has passed, remove all existing mulch and prepare the area for a new layer. This is also a good time to fertilize the soil surface around your plants, because when spring rains occur, it will carry it to their roots. For bulbs – add a 5-10-10 fertilizer as soon as they flower to maximize bloom time and feed next season’s growth.

4. Compost your yard waste.

Dump collected leaves, cuttings, spent foliage, and last season’s mulch into your compost pile. Shred leaves and chip branches larger than ½ inch in diameter to accelerate decomposition. Keep the pile as moist as a wrung-out sponge, and aerate it every two weeks. Just don’t add any early spring weeds that have gone to seed—they might not cook completely and could sprout instead.

But if your like me – add your garden goodies to you vermicomposting pile. The red worms will eat these up like crazy.

5. Pest control essentials.

Rake up all leaves infected with apple scab from under fruit trees to avoid a new outbreak. Rake up blackspot-infected leaves from around roses before spring rains reintroduce disease spores

Before leaf buds break, spray still dormant fruit trees, roses, magnolias and woody shrubs, with dormant oil to smother scale insects.

6. Secure plant supports

– Put peony rings in place before growth begins.
– Set up stakes and netting for garden peas before planting the seeds.
– Tighten or replace wire supports for raspberry and grape canes before buds break.

7. Pre-summer lawn care.

Once the ground is firm, rake up any thatch and leaf debris from all lawn areas. Put the removed organic material under shrubs and hedges as a mulch to conserve moisture and insulate the roots from summer heat.

Top-dress lawns before they begin growing with a mixture of aged manure, peat moss, or shredded leaves.

8. Tools and equipment basics

– Lawn mowers. Remove the blades and sharpen them. Refuel, change the oil and replace spark plugs.
– Sharpen snub-nosed spades and round shovels.
– Clean the blades of pruners with steel wool to remove dried sap.
– Check your wheelbarrow. Repair any wheel punctures, add air to flat tires and tighten nuts and bolts.
– Brush out leftover soil from containers and terra-cotta pots. Soak them in a solution of one part chlorine bleach to nine parts water for 30 minutes, to eliminate pathogens.

9. START SEEDS INDOOR OR BEGIN PURCHASING SEEDLINGS.

Bald Eagles In Our Beautiful State

Lunch time for this eagle

How many people can actually say they’ve seen these beautiful creatures in their backyards? Not many I’m sure. That is why I never take their sightings for granted.

Enjoy 🙂